Tag: wordpress plugin

  • Inline Code Plugin in WordPress

    Inline Code Plugin in WordPress

    Guide for Using the Inline Code Plugin in WordPress

    This guide provides step-by-step instructions for installing, configuring, and using the Inline Code Plugin to style specific text in your WordPress posts or pages with a gray background (#686868) and customizable text colors.

    What This Plugin Does

    The Inline Code Plugin enhances your WordPress content by allowing you to highlight text using a shortcode. It applies a monospaced font and a #686868 background to the enclosed text, with color options for different purposes:

    • Warning: Orange text
    • Success: Green text
    • Error: Red text

    The styling is applied only to the text within the shortcode, leaving the rest of your content unchanged.

    Installation

    1. Prepare the Plugin Files:
    • Navigate to wp-content/plugins/ in your WordPress installation.
    • Create a new folder named inline-code-plugin.
    • Inside inline-code-plugin, create a file named inline-code-plugin.php with the following content:
    <?php
    /*
    Plugin Name: Inline Code Plugin
    Description: A plugin to style text with inline code snippets in different colors with a custom background.
    Version: 1.1
    Author: BVPLAB
    */
    
    if ( ! defined( 'ABSPATH' ) ) {
        exit; // Exit if accessed directly.
    }
    
    // Enqueue the CSS file
    function inline_code_enqueue_styles() {
        wp_enqueue_style('inline-code-style', plugin_dir_url(__FILE__) . 'css/inline-code-style.css');
    }
    add_action('wp_enqueue_scripts', 'inline_code_enqueue_styles');
    
    // Shortcode function to style the enclosed content
    function inline_code_shortcode($atts, $content = null) {
        if (empty($content)) {
            return '';
        }
        $atts = shortcode_atts(array(
            'type' => 'warning',
        ), $atts);
    
        $allowed_types = array('warning', 'success', 'error');
        $type = in_array($atts['type'], $allowed_types) ? $atts['type'] : 'warning';
        $class = 'inline-code-' . $type;
        return '<code class="' . esc_attr($class) . '">' . esc_html($content) . '</code>';
    }
    add_shortcode('inline_code', 'inline_code_shortcode');
    • Create a subfolder named css inside inline-code-plugin, and add a file named inline-code-style.css with the following content:
    code.inline-code-warning {
        color: orange;
        background-color: #686868;
        font-family: Consolas, "Courier New", monospace;
        padding: 2px 4px;
    }
    code.inline-code-success {
        color: green;
        background-color: #686868;
        font-family: Consolas, "Courier New", monospace;
        padding: 2px 4px;
    }
    code.inline-code-error {
        color: red;
        background-color: #686868;
        font-family: Consolas, "Courier New", monospace;
        padding: 2px 4px;
    }
    1. Activate the Plugin:
    • Log in to your WordPress admin dashboard.
    • Go to Plugins > Installed Plugins.
    • Locate “Inline Code Plugin” and click Activate.

    How to Use

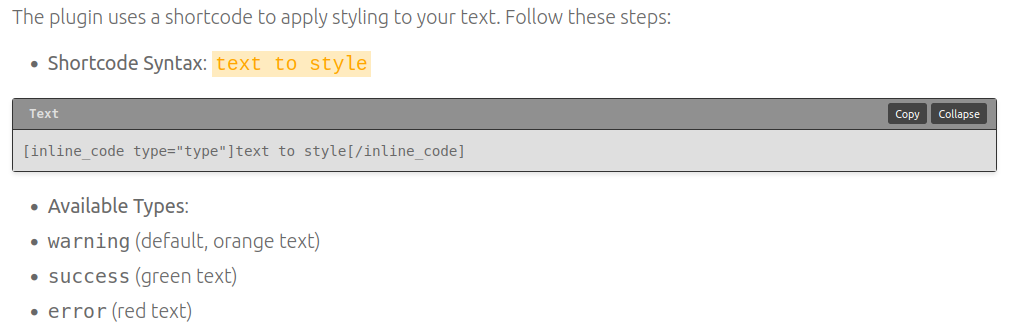
    The plugin uses a shortcode to apply styling to your text. Follow these steps:

    Shortcode Syntax:
    text to style

    Text
    [inline_code type="warning"]text to style[/inline_code]

    Available Types:

    • warning (default, orange text)
    • success (green text)
    • error (red text)

    Examples:

    • Highlight a password warning: Update your password by replacing old_password123 with a new one. Result: “Update your password by replacing old_password123 with a new one.” with “old_password123” in orange on a #686868 background.
    • Indicate a successful operation: Status: Task done Result: “Status: Task done” with “Task done” in green on a #686868 background.
    • Show an error message: Error: Connection lost Result: “Error: Connection lost” with “Connection lost” in red on a #686868 background.

    Steps to Apply:

    1. Open the WordPress editor for the post or page you want to edit.
    2. Insert the shortcode with your desired text and type attribute in the content area.
    3. Save or publish the post/page to view the styled text.

    Customization

    • Background Color: The plugin sets a #686868 background for all styled text. To change it, edit the background-color: #686868; value in the css/inline-code-style.css file for each code.inline-code-* class.
    • Text Color: Adjust the color property in the CSS file (e.g., change orange to another color like #ff4500 for a different orange shade).
    • Padding: Modify the padding: 2px 4px; value in the CSS to increase or decrease the space around the text.

    Troubleshooting

    • Plugin Not Displaying: Ensure the plugin files are correctly placed in wp-content/plugins/inline-code-plugin/ and activated.
    • Styling Issues: Check the CSS file path in inline-code-plugin.php and verify there are no typos in the shortcode.
    • Errors: If a PHP error occurs, deactivate the plugin, review the file syntax, and re-upload if needed. Contact support with the error message for assistance.

    Best Practices

    • Use the shortcode selectively to avoid overwhelming your content.
    • Preview your post/page after adding the shortcode to ensure the text is readable against the #686868 background.
    • Always back up your WordPress site before installing or modifying plugins.

    This guide was created on August 03, 2025, at 08:50 PM PST. Enjoy enhancing your WordPress content with the Inline Code Plugin!

    Try me

  • Custom Codeblock WordPress Plugin

    Custom Codeblock WordPress Plugin

    This guide provides step-by-step instructions for installing, configuring, and using the Custom Codeblock WordPress plugin, which features a stylish code display with copy and expand/collapse options, per-line copy buttons on hover, horizontal scrolling for long lines, and a fixed medium text size.

    Table of Contents

    Installation

    1. Download the Plugin Files:
      • Create a folder named codeblock-plugin in the wp-content/plugins/ directory of your WordPress installation.
      • Place the following files in the codeblock-plugin folder:
        • codeblock-plugin.php
        • codeblock.css
        • codeblock.js
    2. Activate the Plugin:
      • Log in to your WordPress admin panel.
      • Navigate to Plugins > Installed Plugins.
      • Find Custom Codeblock with Copy and Expand/Collapse in the list and click Activate.
    3. Verify Installation:
      • Ensure no errors appear, and the plugin is listed as active.

    Usage

    1. Add a Codeblock:
      • Open the page or post editor in WordPress.
      • Switch to the Text editor (not the Visual editor) to avoid formatting issues.
      • Use the
    Bash
    </code> shortcode to insert a codeblock. Example:</p>
    <pre><code>[codeblock language="PHP"]<br />
    <?php<br />
    echo "Hello World";<br />
    echo "Another line";<br />
    ?><br />
    

    Preview and Publish:

    • Preview the page/post to see the codeblock in action.
    • Publish or update the page/post to make it live.

    Features

    • Code Display: Shows code in a dark-themed container with a language label (e.g., “PHP”, “Bash”).
    • Copy All Button: Located in the header, copies the entire codeblock content to the clipboard with a “Copied!” feedback for 2 seconds.
    • Expand/Collapse: Toggles the codeblock visibility; collapses after copying and expands on demand.
    • Per-Line Copy: Hover over any line to reveal a “Copy” button that copies only that line, with “Copied!” feedback for 2 seconds.
    • Horizontal Scroll: Long lines remain unbroken, with a horizontal scrollbar appearing when content exceeds the container width.
    • Fixed Text Size: Content text is set to a medium size (16px) and cannot be overridden.

    Shortcode Attributes

    • language: Specifies the programming language or format (e.g., “PHP”, “Bash”, “JavaScript”). Default is “Bash”.
      • Example:
        Python
        code here

    Styling and Behavior

    • Appearance: The codeblock has a dark background (#1e1e1e), a header with a slightly lighter shade (#2d2d2d), and white text (#d4d4d4).
    • Text Size: Fixed at 16px (medium) using !important to prevent overrides.
    • Hover Effects: Buttons change to a darker shade (#555) on hover.
    • Scrollbars: Custom-styled horizontal scrollbars appear when needed, with a height of 8px and a thumb color of #555.

    Troubleshooting

    • Code Not Displaying Correctly:
      • Ensure you are using the Text editor in WordPress to avoid auto-formatting.
      • Check that all plugin files are correctly placed and the plugin is activated.
    • Copy Function Not Working:
      • Verify that your browser supports the Clipboard API (modern browsers like Chrome, Firefox, and Edge do).
      • Check the browser console (F12) for errors and ensure no ad blockers or security settings are interfering.
    • Horizontal Scroll Not Appearing:
      • Ensure the .line-content class has white-space: nowrap and the container has sufficient width. Adjust the .codeblock-content padding if needed.
    • Plugin Not Loading:
      • Confirm file permissions are correct (e.g., 644 for files) and the plugin folder is in wp-content/plugins/.
      • Deactivate and reactivate the plugin to reset.

    For further assistance, contact your WordPress administrator or refer to the plugin source files for debugging.

    Try me

  • Simple Notes Plugin: Usage Guide

    Simple Notes Plugin: Usage Guide

    The Simple Notes Plugin (version 1.3) allows you to add styled notes to your WordPress posts and pages using the [ note ] shortcode. Notes can include titles, Font Awesome icons, and content such as text or bulleted lists. The plugin also provides an admin settings page to configure default styles. This guide covers installation, configuration, and usage of the plugin.

    Installation

    1. Download and Install:
      • Upload the simple-notes-plugin folder to your WordPress wp-content/plugins/ directory via FTP, or use the WordPress admin panel to upload the plugin ZIP file.
      • Ensure the folder structure includes:
        • notes-plugin.php (main plugin file)
        • css/notes-style.css (styles for notes)
    2. Activate the Plugin:
      • Navigate to Plugins > Installed Plugins in your WordPress admin panel.
      • Locate “Simple Notes Plugin” and click Activate.
    3. Verify Installation:
      • Upon activation, the plugin automatically enqueues its CSS and, if enabled, Font Awesome for icons. No additional setup is required for basic usage.

    Configuration

    The plugin includes an admin settings page to customize default behavior.

    Click the Save Changes button to apply your settings.

    Access Settings:

    Go to Settings > Notes Plugin in the WordPress admin panel.

    You must have manage_options permissions (typically Administrator role) to access this page.

    Available Settings:

    Default Note Type: Select the default style for notes when the type attribute is not specified in the [ note ] shortcode. Options are info, warning, success, or error.

    Enable Icons: Choose whether to enable Font Awesome icons. If set to “No,” the icon attribute in shortcodes is ignored, and Font Awesome is not loaded.

    Attributes

    • type (optional): Specifies the note style. Options: info, warning, success, error. Defaults to the value set in the admin settings (usually info).
    • title (optional): Adds a bold title above the note content.
    • icon (optional): Specifies a Font Awesome icon class (e.g., fa-info-circle). Only works if icons are enabled in the settings.

    Example Shortcodes

    • Basic Note:
      This is an informational note.
      Bash
      [note type="info"]This is an informational note.[/note]
      Displays a blue-bordered note with a light blue background.
    • Note with Title and Icon:
      Important Warning
      Take caution when proceeding.
      Bash
      [note type="warning" title="Important Warning" icon="fa-exclamation-triangle"]Take caution when proceeding.[/note]
      Displays a yellow-bordered note with a title and a warning icon (if icons are enabled).
    • Note with Bulleted List:
      Key Achievements
      • First achievement
      • Second achievement
      Bash
      [note type="success" title="Key Achievements" icon="fa-check-circle"]<ul><li>First achievement</li><li>Second achievement</li></ul>[/note]
      Displays a green-bordered note with a title, icon, and a bulleted list.

    Styling

    Notes are styled with distinct colors and formatting:

    • Info: Blue border and light blue background.
    • Warning: Yellow border and light yellow background.
    • Success: Green border and light green background.
    • Error: Red border and light red background.
    • Titles are bold and displayed above the content.
    • Icons (if enabled) appear next to the title.
    • Bulleted lists use standard HTML <ul><li> tags and are indented for clarity.

    Adding Notes

    To add a note:

    1. Edit a post or page in the WordPress editor (block or classic editor).
    2. Insert the shortcode with the desired attributes and content.
    3. Save or publish the post/page to see the rendered note.

    For bulleted lists, use HTML <ul><li> tags within the shortcode content, as shown in the example above.

    Finding Font Awesome Icons

    If icons are enabled, you can use Font Awesome icon classes in the icon attribute. Visit Font Awesome to find available icons. Examples include:

    • fa-info-circle (info icon)
    • fa-exclamation-triangle (warning icon)
    • fa-check-circle (success icon)
    • fa-times-circle (error icon)

    Tips and Best Practices

    • Shortcode Placement: Use the shortcode in the WordPress editor’s text mode or as a shortcode block in the block editor to ensure proper rendering.
    • Content Security: The plugin sanitizes all inputs, allowing only safe HTML (e.g., <ul>, <li>) in the note content.
    • Custom Styling: To customize note appearance, copy css/notes-style.css to your theme and modify it. Avoid editing the plugin’s CSS directly to preserve changes during updates.
    • Icon Usage: If you don’t need icons, disable them in the settings to reduce page load time by skipping the Font Awesome CDN.

    Troubleshooting

    • Notes Not Displaying: Ensure the shortcode is correctly formatted and not corrupted by the editor. Check that the content is not empty.
    • Icons Not Showing: Verify that “Enable Icons” is set to “Yes” in the settings and that a valid Font Awesome icon class is used.
    • Styling Issues: Clear your site’s cache if using a caching plugin, as styles may not update immediately.
    • Shortcode Not Rendering: Ensure the plugin is activated and that no other plugins are interfering with shortcode processing.

    For additional support, contact your site administrator or refer to the plugin’s documentation.

    Try me